
In the world of video editing, Adobe Premiere Pro stands tall as one of the industry’s leading software, empowering creators to transform their visions into cinematic masterpieces. However, navigating the intricate landscape of Premiere Pro requires more than just technical know-how.
By employing Edward de Bono’s Six Thinking Hats framework, we can explore various facets of becoming a true professional in the realm of Adobe Premiere Pro.
1. The White Hat – Factual Information:
Start your journey to Premiere Pro mastery by gathering factual information. Understand the basics of the software, its interface, and the tools at your disposal. Explore the Adobe Creative Cloud resources, online tutorials, and official documentation. Acquaint yourself with the technical specifications of your project, including resolution, frame rate, and codec requirements. Building a strong foundation of knowledge is essential for efficient and effective video editing.
Here are some essential features and tools in Adobe Premiere Pro:
- Timeline Panel:
- The timeline is the core workspace where video and audio clips are arranged and edited.
- Keyframe animation allows for precise control of effects and transitions over time.
- Editing Tools:
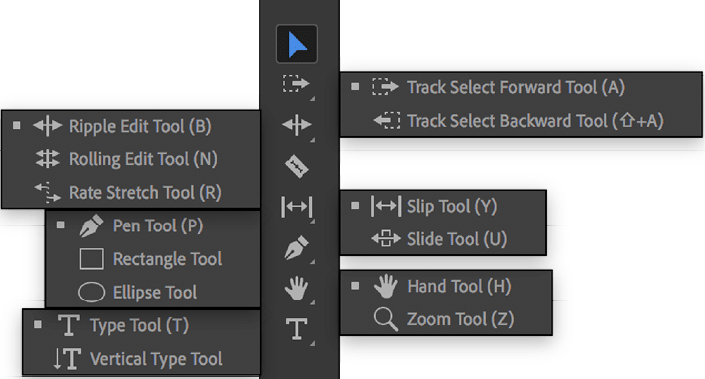
- Selection Tool: Used for selecting and moving clips.
- Razor Tool: Cuts clips at a specific point on the timeline.
- Pen Tool: Creates keyframes for animation and effects.
- Import and Export:
- Media Browser: Allows for easy import of media files.
- Import Formats: Supports a wide range of video, audio, and image formats.
- Export Options: Various presets for different platforms and custom export settings.
- Effects and Transitions:
- Effect Controls Panel: Adjusts settings for video and audio effects.
- Video and Audio Transitions: Seamless transitions between clips.
- Lumetri Color Panel: Comprehensive color grading tools for achieving the desired look.
- Audio Editing:
- Audio Meters: Monitors audio levels in real-time.
- Essential Sound Panel: Streamlines audio editing with presets for different types of audio.
- Audio Effects: Offers a variety of effects to enhance and manipulate audio.
- Motion Graphics Templates:
- Essential Graphics Panel: Customizes and manages motion graphics templates.
- Title Tool: Creates text and graphic overlays.
- Multi-Camera Editing:
- Multi-Camera Monitor: Simplifies editing projects shot with multiple cameras.
- Sync Settings: Automatically syncs clips based on audio or timecode.
- Dynamic Link with Adobe After Effects and Adobe Audition:
- Dynamic Link: Seamlessly integrates with After Effects and Audition for advanced motion graphics and audio editing.
- Workspace Customization:
- Customizable Interface: Tailor the workspace to your preferences.
- Keyboard Shortcuts: Speed up your workflow with personalized keyboard shortcuts.
- Collaboration Tools:
- Shared Projects: Facilitates collaborative editing by multiple users.
- Team Projects: Allows for cloud-based collaboration.
- VR Editing:
- 360° VR Video Editing: Supports editing and exporting of immersive virtual reality content.
- Automatic Color Correction:
- Auto Color: One-click color correction for quick adjustments.
- Integration with Adobe Stock:
- Adobe Stock Integration: Access to a vast library of stock footage and music directly from the software.
- Proxy Workflow:
- Ingest Settings: Simplifies the process of working with high-resolution footage by creating low-res proxies for smoother editing.
- Responsive Design:
- Responsive Design Tools: Easily switch between landscape and portrait orientations for different platforms.
System requirements for optimal performance
Windows:
- Processor: Multi-core processor with 64-bit support
- Operating System: Microsoft Windows 10 (64-bit) version 1809 or later
- RAM: 16 GB or more of RAM (32 GB recommended)
- Hard Disk Space: Fast internal SSD (recommended) for app installation and cache; additional high-speed drive(s) for media
- GPU: 4 GB of GPU VRAM (8 GB recommended)
- Monitor Resolution: 1920 x 1080 or greater display resolution
- Sound Card: ASIO compatible or Microsoft Windows Driver Model
- Internet: Internet connection and registration are necessary for required software activation, validation of subscriptions, and access to online services.
macOS:
- Processor: Multi-core Intel processor with 64-bit support
- Operating System: macOS v10.14 or later
- RAM: 16 GB or more of RAM (32 GB recommended)
- Hard Disk Space: Fast internal SSD (recommended) for app installation and cache; additional high-speed drive(s) for media
- GPU: 4 GB of GPU VRAM (8 GB recommended)
- Monitor Resolution: 1920 x 1080 or greater display resolution
- Internet: Internet connection and registration are necessary for required software activation, validation of subscriptions, and access to online services.
Additional Notes:
- Adobe recommends using dedicated GPU cards for optimal performance.
- For video editing involving high-resolution footage or complex effects, a more powerful system may be required.
- It’s crucial to keep both the operating system and graphics drivers up-to-date for optimal performance and compatibility.
2. The Red Hat – Intuition and Emotion:
Tap into your creative instincts and emotions when using Premiere Pro. Video editing is an art form, and your emotional connection to your project can greatly influence its impact. Trust your intuition when making creative decisions, from choosing the right music to selecting the most compelling shots.
Embrace experimentation, as sometimes the best ideas emerge from unexpected places. Let your passion guide you as you weave a story through the seamless integration of visuals and emotions.
Emotions to associate with the editing process
The editing process in Adobe Premiere Pro, or any video editing software, can evoke a range of emotions depending on the project’s nature, your level of expertise, and the creative decisions you make. Here are some emotions commonly associated with the editing process:
- Excitement:
- When to Feel It: During the initial stages of editing when ideas are taking shape.
- Why: Excitement often accompanies the anticipation of turning raw footage into a polished and engaging video.
- Frustration:
- When to Feel It: When faced with technical challenges or creative blocks.
- Why: Video editing can be intricate, and unexpected issues may arise. Frustration can be a natural response when things don’t go as planned.
- Satisfaction:
- When to Feel It: After successfully executing a challenging edit or achieving a desired effect.
- Why: The sense of accomplishment and seeing your creative vision come to life can be immensely satisfying.
- Anxiety:
- When to Feel It: Approaching deadlines or when making crucial decisions.
- Why: Tight timelines or the pressure to deliver a high-quality product can lead to feelings of anxiety.
- Joy:
- When to Feel It: When discovering a perfect edit or experiencing positive feedback.
- Why: Editing allows for the creation of emotionally resonant content, and finding that perfect moment can bring joy.
- Curiosity:
- When to Feel It: Exploring new features, effects, or techniques within Premiere Pro.
- Why: Embracing curiosity can lead to creative breakthroughs and the discovery of innovative editing methods.
- Flow:
- When to Feel It: When fully immersed in the editing process, losing track of time.
- Why: Achieving a state of flow can result in a more efficient and enjoyable editing experience.
- Doubt:
- When to Feel It: When unsure about creative choices or the overall direction of the project.
- Why: Editing involves making numerous decisions, and doubt can arise when faced with multiple possibilities.
- Pride:
- When to Feel It: When presenting the final product and receiving positive feedback.
- Why: Taking pride in your work is a natural response to the successful completion of a project.
- Awe:
- When to Feel It: Watching the final edited piece and realizing its impact.
- Why: Awe can be inspired by the transformation of raw footage into a compelling narrative.
3. The Black Hat – Critical Thinking:
Approach your editing process with a critical mindset. Evaluate the strengths and weaknesses of each edit. Are your transitions seamless? Is the pacing appropriate for the narrative? Are there distractions that could be eliminated? Utilize Premiere Pro’s editing tools critically, from the timeline to the color grading features. By assessing your work objectively, you can refine your editing skills and produce a polished final product.
What are the common mistakes or challenges faced by beginners in Premiere Pro?
Here are some of the typical issues encountered by newcomers to Premiere Pro:
- Overlooking Tutorials and Documentation:
- Mistake: Neglecting to go through tutorials and official documentation.
- Why: Premiere Pro has a steep learning curve, and skipping tutorials can lead to a lack of understanding of essential features and workflows.
- Poor File Organization:
- Mistake: Neglecting to organize files and projects systematically.
- Why: Disorganized files can lead to confusion, slower workflow, and difficulty locating assets.
- Ignoring Keyboard Shortcuts:
- Mistake: Relying solely on the mouse for every action.
- Why: Learning keyboard shortcuts significantly speeds up the editing process. Ignoring them can result in a less efficient workflow.
- Underestimating the Importance of Audio:
- Mistake: Overlooking audio quality and balance.
- Why: Good audio is crucial for video production. Neglecting to properly mix and edit audio can result in a less professional final product.
- Overusing Transitions and Effects:
- Mistake: Applying too many transitions and effects.
- Why: Overuse of transitions and effects can distract from the content and make the video look amateurish. Less is often more.
- Ignoring Color Correction and Grading:
- Mistake: Neglecting to color correct and grade footage.
- Why: Proper color correction enhances the overall look and feel of a video. Ignoring this step can lead to a less polished final product.
- Not Backing Up Projects:
- Mistake: Failing to regularly save and back up projects.
- Why: Losing unsaved work due to a software crash or other issue can be devastating. Regularly save and back up your projects to avoid data loss.
- Using Low-Quality Source Material:
- Mistake: Editing with low-quality or improperly formatted source footage.
- Why: The quality of the source material directly impacts the final output. Using low-quality footage can limit the potential of the edit.
- Not Considering Output Settings:
- Mistake: Neglecting to set appropriate export settings.
- Why: Incorrect export settings can result in poor video quality or compatibility issues. Understanding the export settings is crucial for delivering the intended final product.
- Rushing the Editing Process:
- Mistake: Rushing through the editing process without proper planning.
- Why: Editing requires time and attention to detail. Rushing can lead to mistakes, oversights, and a less polished final product.
- Fearing Experimentation:
- Mistake: Avoiding experimentation with new features or techniques.
- Why: Premiere Pro offers a range of creative tools. Fear of experimentation can limit your growth as an editor. Embrace learning and trying new things.
- Not Paying Attention to Playback Quality:
- Mistake: Editing with a low-quality playback setting.
- Why: To accurately assess edits, it’s important to set playback quality to a level that allows for smooth and detailed review.
4. The Yellow Hat – Positive Outlook:
Maintain a positive outlook throughout your editing journey. Premiere Pro is a powerful tool, and your skills will only improve with practice. Celebrate your successes, whether it’s a smooth transition, a perfectly timed cut, or a well-executed visual effect. Positive reinforcement fosters creativity and motivation. Recognize that every challenge is an opportunity to learn and grow, and approach each project with enthusiasm and a can-do attitude.
Benefits of becoming proficient in Adobe Premiere Pro
Becoming proficient in Adobe Premiere Pro, a leading video editing software, offers a wide range of benefits for individuals involved in video production and editing. Here are some key advantages of mastering Premiere Pro:
- Versatility:
- Benefit: Premiere Pro is a versatile tool suitable for various types of projects, from short films and documentaries to corporate videos and social media content. Mastering it allows you to work on a diverse range of creative endeavors.
- Industry Standard:
- Benefit: Premiere Pro is an industry-standard software used by professionals in film, television, and online content creation. Proficiency in Premiere Pro is a valuable skill that can open doors to job opportunities in the media and entertainment industry.
- Seamless Integration with Adobe Creative Cloud:
- Benefit: Premiere Pro seamlessly integrates with other Adobe Creative Cloud applications like After Effects and Photoshop. This integration allows for a smooth workflow, enabling dynamic collaboration between different creative aspects of a project.
- Advanced Editing Capabilities:
- Benefit: Premiere Pro provides advanced editing capabilities, including multi-camera editing, color correction, audio editing, motion graphics, and more. Mastering these features empowers editors to create sophisticated and professional-looking videos.
- Efficient Workflow:
- Benefit: Proficient users can take advantage of Premiere Pro’s efficient workflow, incorporating keyboard shortcuts, customizable workspaces, and other time-saving features. This efficiency is crucial, especially in fast-paced production environments.
- Creative Control:
- Benefit: Premiere Pro offers extensive creative control over video and audio elements. Mastery of the software enables editors to execute their creative vision, experiment with different techniques, and produce visually stunning and engaging content.
- Wide Range of Export Options:
- Benefit: Premiere Pro provides a variety of export options, including presets for different platforms and custom export settings. This flexibility ensures that your final product meets the specific requirements of your intended audience or distribution platform.
- Constant Updates and Improvements:
- Benefit: Adobe regularly updates Premiere Pro, introducing new features and improvements. Proficient users can stay current with the latest tools and techniques, enhancing their ability to deliver high-quality and up-to-date video content.
- Community Support and Resources:
- Benefit: Being proficient in Premiere Pro means having access to a vast community of users, forums, and online resources. This support network can be invaluable for troubleshooting issues, seeking advice, and staying informed about industry trends.
- Increased Efficiency in Collaborative Projects:
- Benefit: Premiere Pro facilitates collaboration on projects through features like shared projects and team projects. Proficient users can contribute to collaborative efforts seamlessly, enhancing the overall efficiency of the team.
- Career Opportunities:
- Benefit: Proficiency in Premiere Pro enhances your resume and increases your marketability in the job market. Video editing skills are in demand across various industries, and knowledge of Premiere Pro is a valuable asset for employers.
- Personal and Professional Growth:
- Benefit: Mastering Premiere Pro can be a rewarding journey of personal and professional growth. As you tackle more complex projects and explore advanced features, you’ll continually develop your skills and gain confidence in your abilities as a video editor.
5. The Green Hat – Creativity and New Ideas:
Encourage a free flow of ideas and creativity when working in Premiere Pro. Experiment with new techniques, effects, and transitions to elevate your editing style. Stay updated on the latest trends in video editing and cinematography. Join online communities and forums to share ideas and learn from fellow editors. Premiere Pro’s continuous updates bring new features and capabilities—embrace them to push the boundaries of your creativity.
Streamline your editing workflow for maximum creativity
Here are some tips to help you achieve a more streamlined editing process:
1. Organize Your Media:
- Create Folders: Organize your project files into folders based on categories such as footage, audio, graphics, etc.
- Use Bins: Utilize bins in the project panel to further organize and categorize your media assets.
2. Master Keyboard Shortcuts:
- Learn Essential Shortcuts: Memorize and use keyboard shortcuts for common tasks to speed up your workflow.
- Customize Shortcuts: Customize shortcuts to match your preferences and enhance your editing speed.
3. Utilize Workspaces:
- Customize Workspaces: Customize the Premiere Pro workspace to suit your needs. Save different workspaces for editing, color grading, and audio mixing.
- Workspaces for Specific Tasks: Switch between workspaces for specific tasks to optimize your screen real estate.
4. Create Templates:
- Project Templates: Create project templates for recurring types of videos. This can include pre-set sequences, effects, and graphics.
- Title Templates: Create title templates for consistent branding across your projects.
5. Ingest Settings and Proxies:
- Use Ingest Settings: Set up ingest settings to automatically transcode footage upon import, optimizing it for editing.
- Proxy Workflow: Implement a proxy workflow for smoother playback, especially with high-resolution footage.
6. Marking and Labeling:
- Markers: Use markers to highlight important points in your timeline or make notes for revisions.
- Color Labels: Apply color labels to clips for easy visual identification of different types of footage or elements.
7. Automate Repetitive Tasks:
- Automate Effects: Use presets and automate repetitive effects to save time.
- Automate Transitions: Apply default transitions to all cuts or automate transitions where needed.
8. Master the Timeline:
- Use Keyboard Shortcuts: Learn keyboard shortcuts for timeline navigation, marking in/out points, and trimming.
- Customize Timeline Views: Customize the timeline panel to display only the necessary information.
9. Group and Link Clips:
- Group Clips: Group related clips together to move and edit them as a unit.
- Link Audio and Video: Link audio and video clips to maintain synchronization during edits.
10. Leverage Premiere Pro’s Features:
- Dynamic Link: Use dynamic link to seamlessly move between Premiere Pro and other Adobe applications like After Effects and Audition.
- Essential Graphics Panel: Use the Essential Graphics panel for easy and efficient text and graphics editing.
11. Regularly Save and Backup:
- Auto-Save: Enable auto-save in Premiere Pro to prevent loss of work in case of a crash.
- Backup Projects: Manually back up your projects to avoid potential data loss.
12. Optimize Playback Settings:
- Lower Playback Resolution: Lower the playback resolution for smoother real-time editing.
- Use Proxies: Utilize proxies, especially when working with high-resolution footage.
13. Stay Updated and Educated:
- Stay Informed: Keep up-to-date with the latest features and updates in Premiere Pro.
- Continuous Learning: Invest time in continuous learning through tutorials, online courses, and community forums.
14. Collaborative Editing:
- Shared Projects: Utilize shared projects for collaborative editing with team members.
- Communication: Establish clear communication channels with collaborators to ensure a smooth workflow.
6. The Blue Hat – Organization and Control:
Maintain control and organization throughout the editing process. Develop a structured workflow, from importing footage to exporting the final product. Utilize Premiere Pro’s organizational tools, such as bins, labels, and markers, to keep your project tidy. Establish a naming convention for files and folders to streamline collaboration and future edits. Control the pacing of your project by mastering the art of timeline management. A well-organized project allows for greater focus on the creative aspects of editing.
Here are several strategies to help you manage your time efficiently while editing in Adobe Premiere Pro:
1. Set Clear Goals and Prioritize:
- Define clear objectives for each editing session.
- Prioritize tasks based on importance and deadlines.
2. Create a Project Timeline:
- Develop a project timeline that includes all stages from importing footage to final export.
- Break down the timeline into manageable segments for each editing session.
3. Batch Similar Tasks:
- Group similar tasks together, such as organizing footage, color grading, or adding effects.
- Batch processing reduces context-switching and improves focus.
4. Utilize Keyboard Shortcuts:
- Learn and master keyboard shortcuts to perform tasks more efficiently.
- Use shortcuts for common actions like cutting, trimming, and navigating the timeline.
5. Use Templates and Presets:
- Create templates for recurring types of projects to streamline the editing process.
- Utilize presets for effects, transitions, and color grading.
6. Incorporate a Proxy Workflow:
- Use proxies, especially when working with high-resolution footage, to enhance playback speed and responsiveness.
- Switch to full resolution during the final review and export stages.
7. Implement Auto-Save and Backups:
- Enable auto-save in Premiere Pro to prevent data loss in case of unexpected issues.
- Regularly back up your project files to an external drive or cloud storage.
8. Set Realistic Deadlines:
- Establish realistic deadlines for project milestones.
- Break down larger projects into smaller tasks with achievable deadlines.
9. Focus on High-Impact Edits First:
- Prioritize edits that have the most significant impact on the project.
- Address critical elements, such as key scenes or transitions, before refining minor details.
10. Avoid Perfectionism:
- Strive for high quality, but recognize when a task is “good enough” to move forward.
- Spending excessive time on small details can lead to diminishing returns.
11. Use Markers and Notes:
- Use markers and notes to highlight specific areas that need attention or revisions.
- Quickly identify areas for improvement during subsequent editing sessions.
12. Optimize Hardware and Software Settings:
- Optimize Premiere Pro settings for better performance.
- Ensure your computer hardware meets or exceeds the software requirements.
13. Minimize Distractions:
- Create a dedicated and organized workspace.
- Turn off unnecessary notifications and minimize interruptions during editing sessions.
14. Collaborate Effectively:
- Communicate clearly with team members to avoid misunderstandings and delays.
- Utilize collaboration features in Premiere Pro, such as shared projects, for efficient teamwork.
15. Continuous Learning:
- Invest time in learning new features and techniques to improve efficiency.
- Stay informed about industry trends and best practices.
16. Regular Breaks:
- Take short breaks to prevent burnout and maintain focus.
- Use techniques like the Pomodoro Technique, where you work in short bursts followed by brief breaks.
17. Evaluate and Adjust:
- Regularly assess your workflow and identify areas for improvement.
- Be willing to adapt and adjust your strategies based on your experiences.
Conclusion:
By donning the six thinking hats of Edward de Bono, you can navigate the complex landscape of Adobe Premiere Pro with finesse and creativity. From factual information to emotional intuition, critical thinking to positive outlook, creativity to organization, each hat contributes to a holistic approach to professional video editing.
Embrace these principles, and you’ll find yourself not just using Adobe Premiere Pro but mastering it, producing videos that captivate and inspire.
Pingback: Top Adobe Premiere Pro Plugins to Boost Your Video Editing (Without Breaking the Bank) - TechVoltMedia
Pingback: How to Deliver Engaging Multimedia Content Marketing in 2024 - TechVoltMedia
Pingback: Lights, Camera, Action! Smartphone Filmmaking in Your Pocket - TechVoltMedia